
Using this guide, you will create a workflow with Build on Standard Library that responds to incoming text messages. The result will be fully customizable to support whatever SMS messaging functionality you require. Let’s get started!
What You’ll Need Beforehand
- 1x Twilio account — https://www.twilio.com/
- 1x Standard Library Account — https://stdlib.com/
- 1x Cell Phone
- 5x Minutes (or 300x Seconds)
Minute 1: Set up your Message Hub Workflow
First, we’ll head over to https://build.stdlib.com (Build on Standard Library) to create our workflow. You’ll want to pick the following options:
Event:Twilio → sms.received
Actions:Twilio → Send a Message
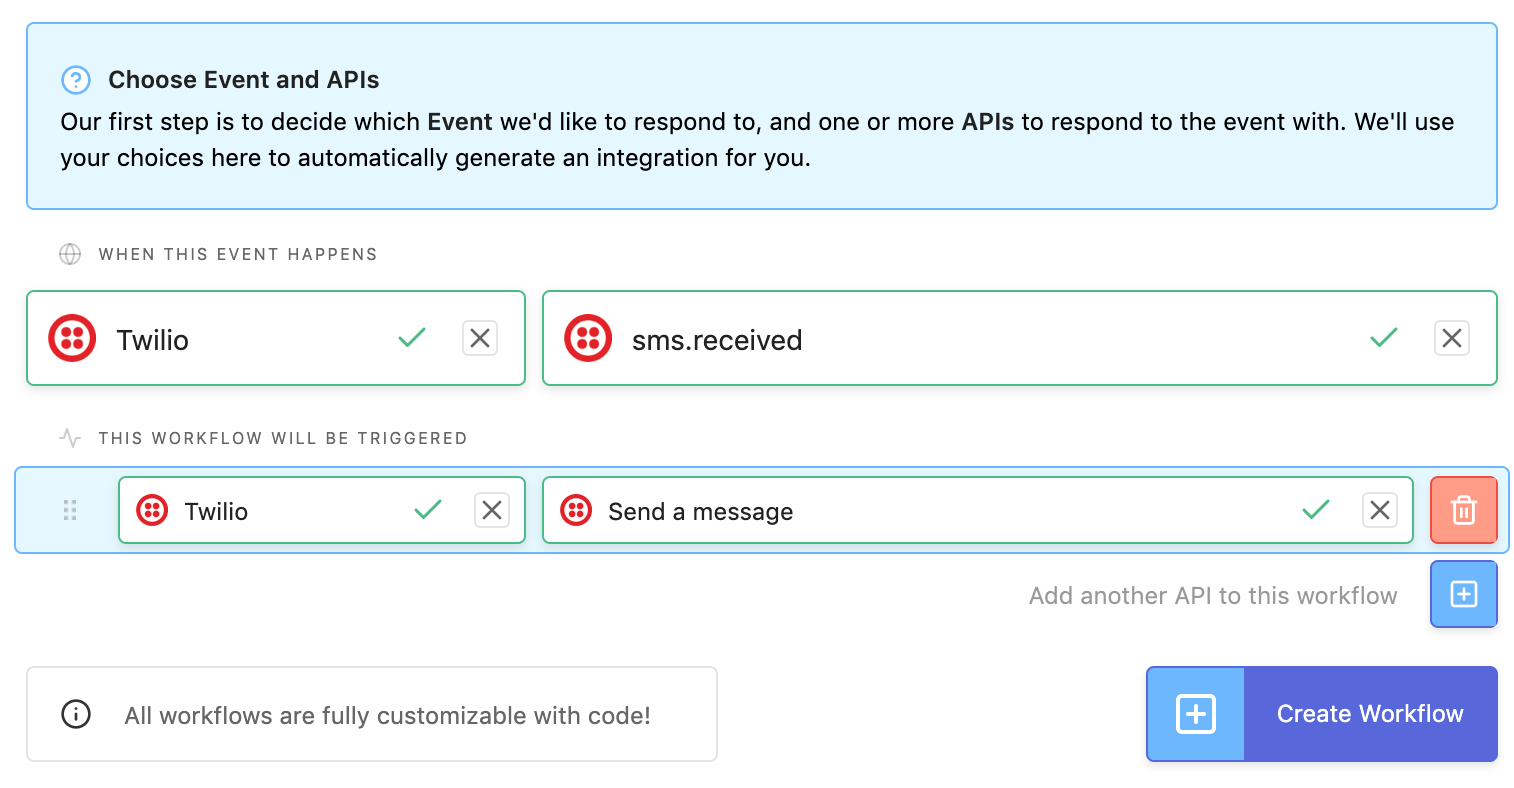
Once you have selected those options, click “Create Workflow”. If you have not registered for Standard Library yet, you will be prompted to sign up (or log in) at this stage.
Minute 2: Link your Twilio Account
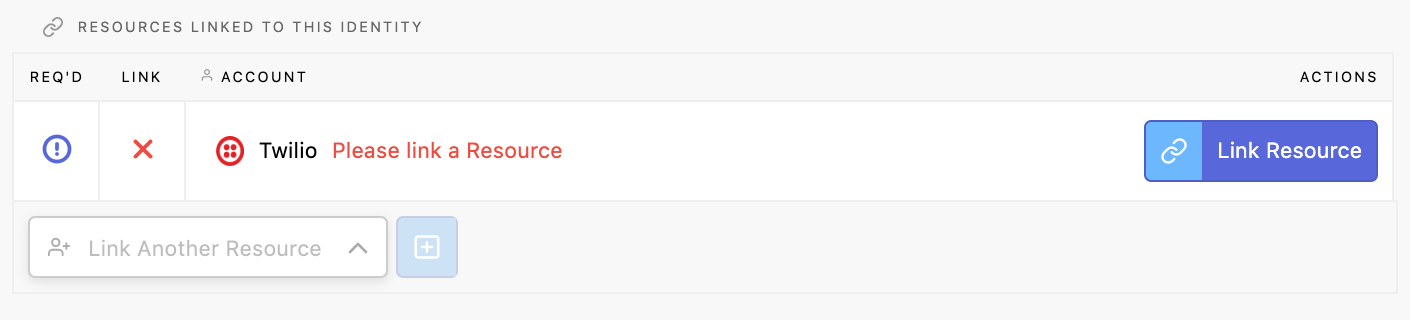
The next step is to link your Twilio account and a phone number. Standard Library, on top of generating Node.js code-based workflows, also provides Identities that manage third-party API credentials. After clicking “Create Workflow” in the last step, you should see a screen like this:

From here, we’ll want to click the Link Resource button to the right of Twilio…
And we’ll be prompted with this screen:

Click “Link New Resource” to proceed, which will start the Twilio Connect flow. You’ll be prompted to log into Twilio, or create an account if you don’t have one.
When this step completes, you’ll be asked to pick a phone number to associate with this workflow:

You can see two sections, phone numbers you already own and phone numbers available for purchase. Below the number are the capabilities of the number i.e., can it SMS, MMS, make and receive calls or fax.
Note: If you already have a Twilio account and own a few numbers, you may be wondering why none of them appear under “Numbers you own”. This is due to how Twilio Connect apps work. When you authorize with the Standard Libary Twilio connect app, a new sub-account is created within your Twilio account. The sub-account is used by the Twilio APIs hosted on Standard Library. Since it’s effectively a brand new account, it will have no numbers associated with it. When you purchase a number from the above screen, it will be available to the sub-account, but not to your main account. This creates a nice separation between your main Twilio account, and any integrations you build with Standard Library.
After you choose a number and click “Finish” you’ll be brought back to the Identity Management screen. It should look something like this:

We can now click “Next” to continue, and start prototyping your workflow!
Minute 3: Prototype your Workflow
You should now see a screen that looks like this:
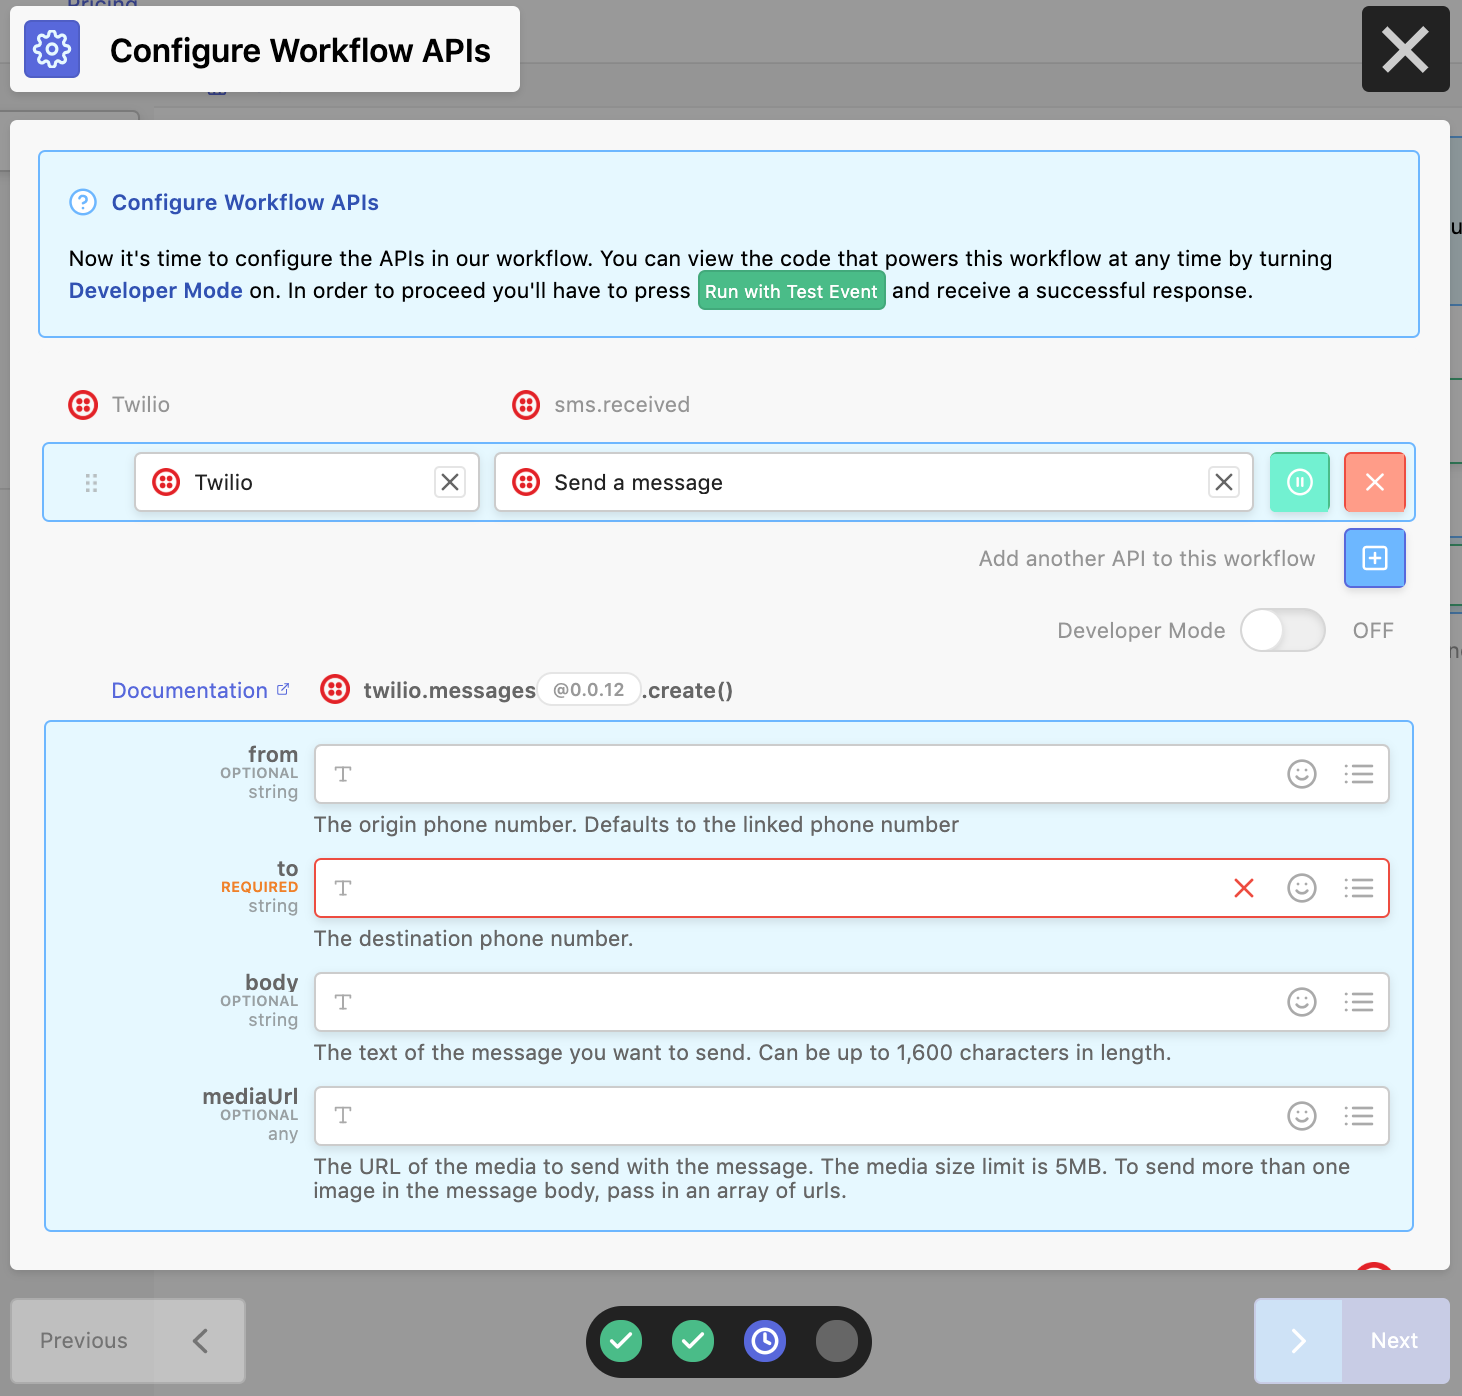
This page is where you can configure the actions picked at the start of building your workflow. We only picked one, Twilio → Send a Message. It takes up to four parameters. For our purposes, we’re only going to need to configure two of them.
First the to parameter. Click the list icon (next to the 😀). You’ll see a dropdown filled with potential variables, all coming from the Twilio sms.received event.

You’ll want to choose event.From which is the origin phone number. The second parameter we want to configure is body. For that, choose event.Body. That is the text of the SMS. With this setup, whenever you text your Twilio number, you’ll get your message echoed back.

Now to test the workflow, you need to configure the test event data. Click the “gear” icon next to the “Run with Test Event” button. An editor will open where you can configure the test data.
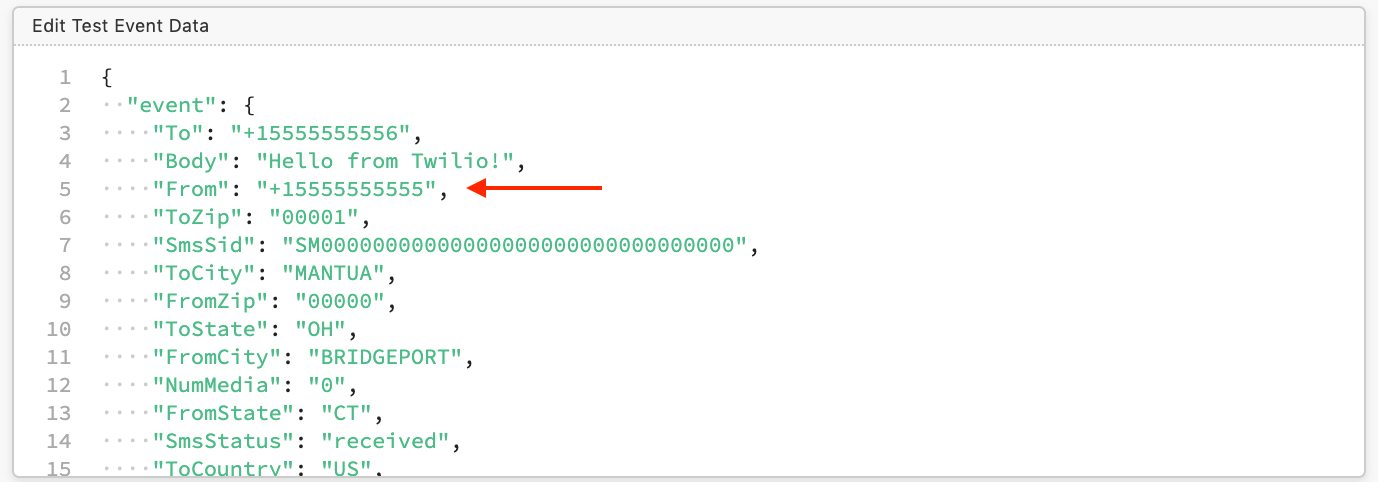
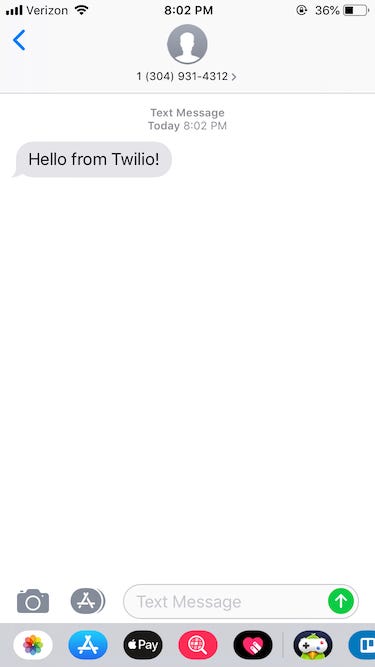
Change the From field to your phone number and click “Run with Test Event” and you should get a text:
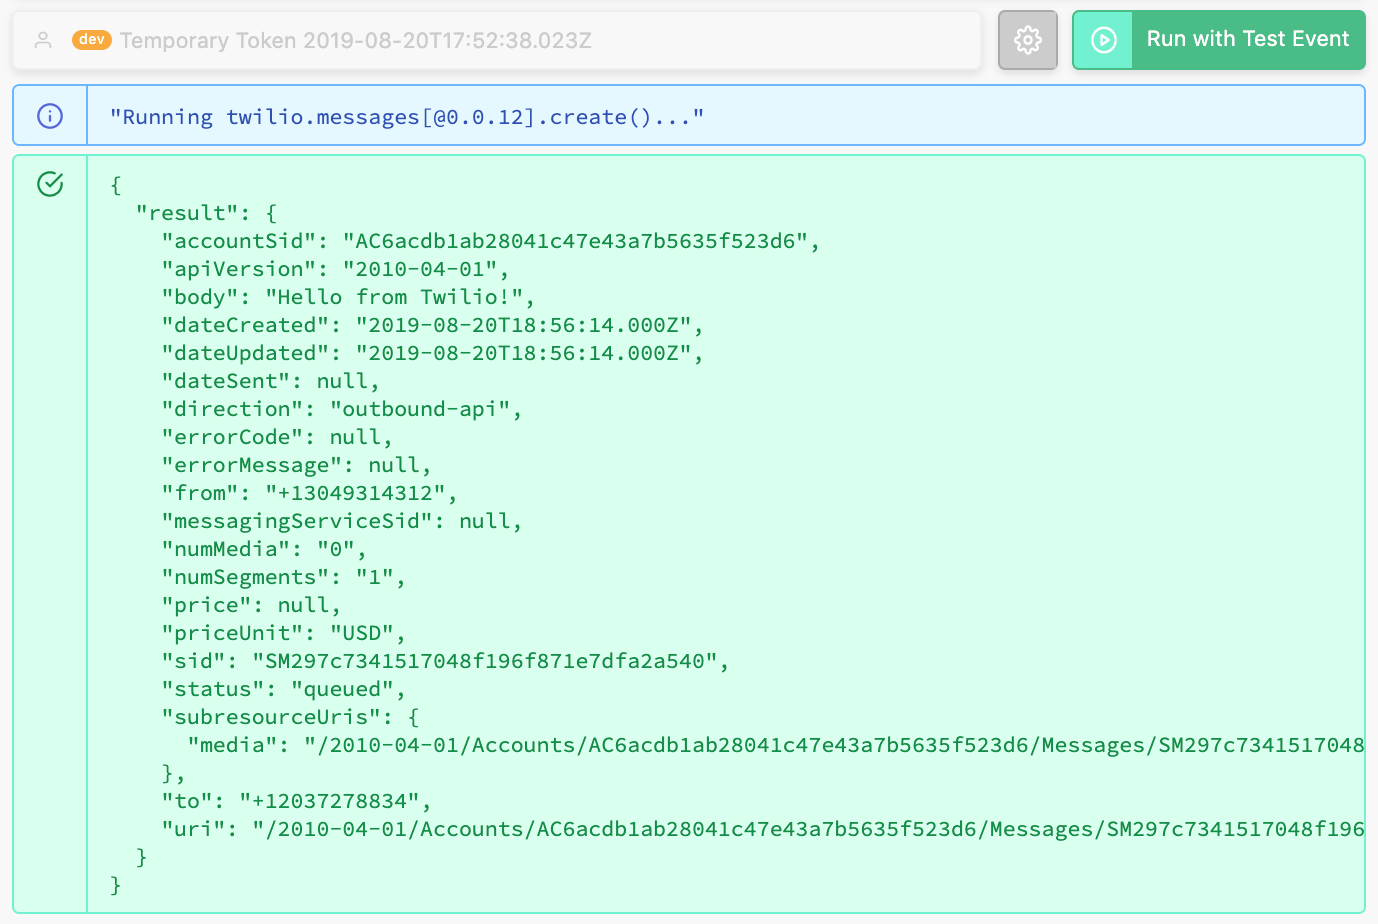
As well as a response similar to this:
Minute 4: Ship your Workflow!
After running this workflow successfully in the last step, the blue Nextbutton on the bottom right should be enabled, click it to proceed.
After clicking Next, you’ll see this screen:
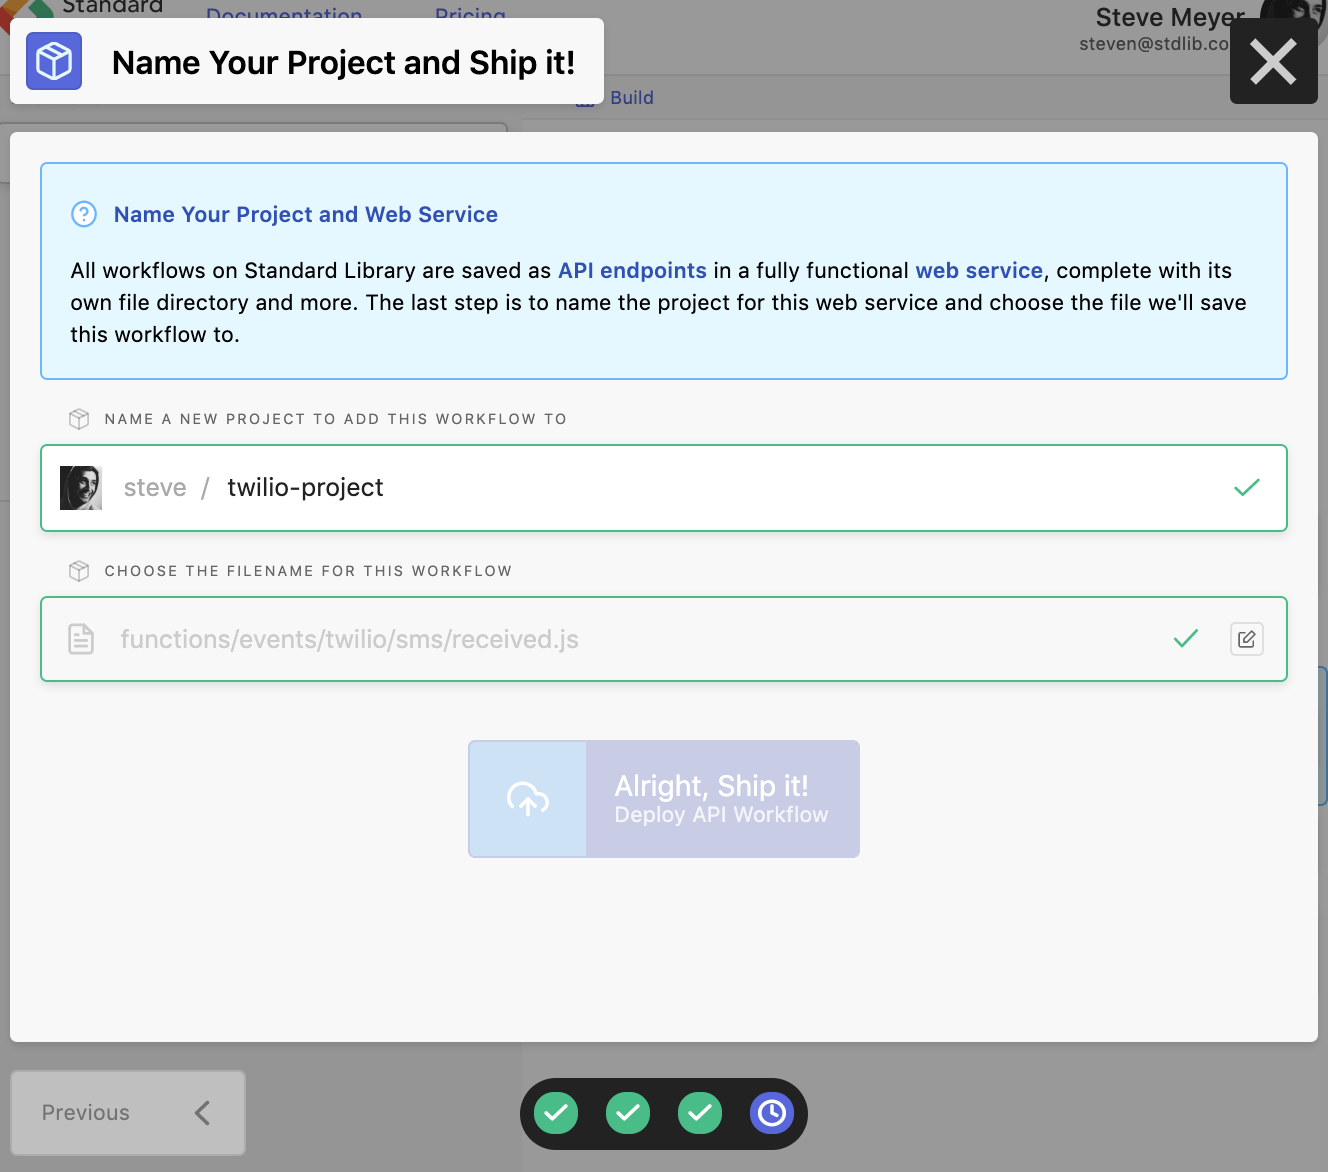
The name of your Project should be automatically generated, along with the filename in which we’ll store our code-based workflow. Simply click “Alright, Ship it!” to proceed. You’ll see the following prompt:

That’s it! Your SMS hub has been shipped. Send it a text and you should get an echo back. Next, let’s make things a bit more interesting…
Minute 5: Customizing your Workflow
Once you click “View Project” you’ll be brought to a project management screen. From here you can do all sorts of cool things — you can learn more about modifying workflows in our documentation.

For now, click “dev (click to manage)” to see your workflow development environment. You’ll see a summary of your workflow project and the API actions it’s taking.

From here, we can edit this workflow code by clicking “Edit Code” to open up Code on Standard Library, Standard Library’s in-browser editor.
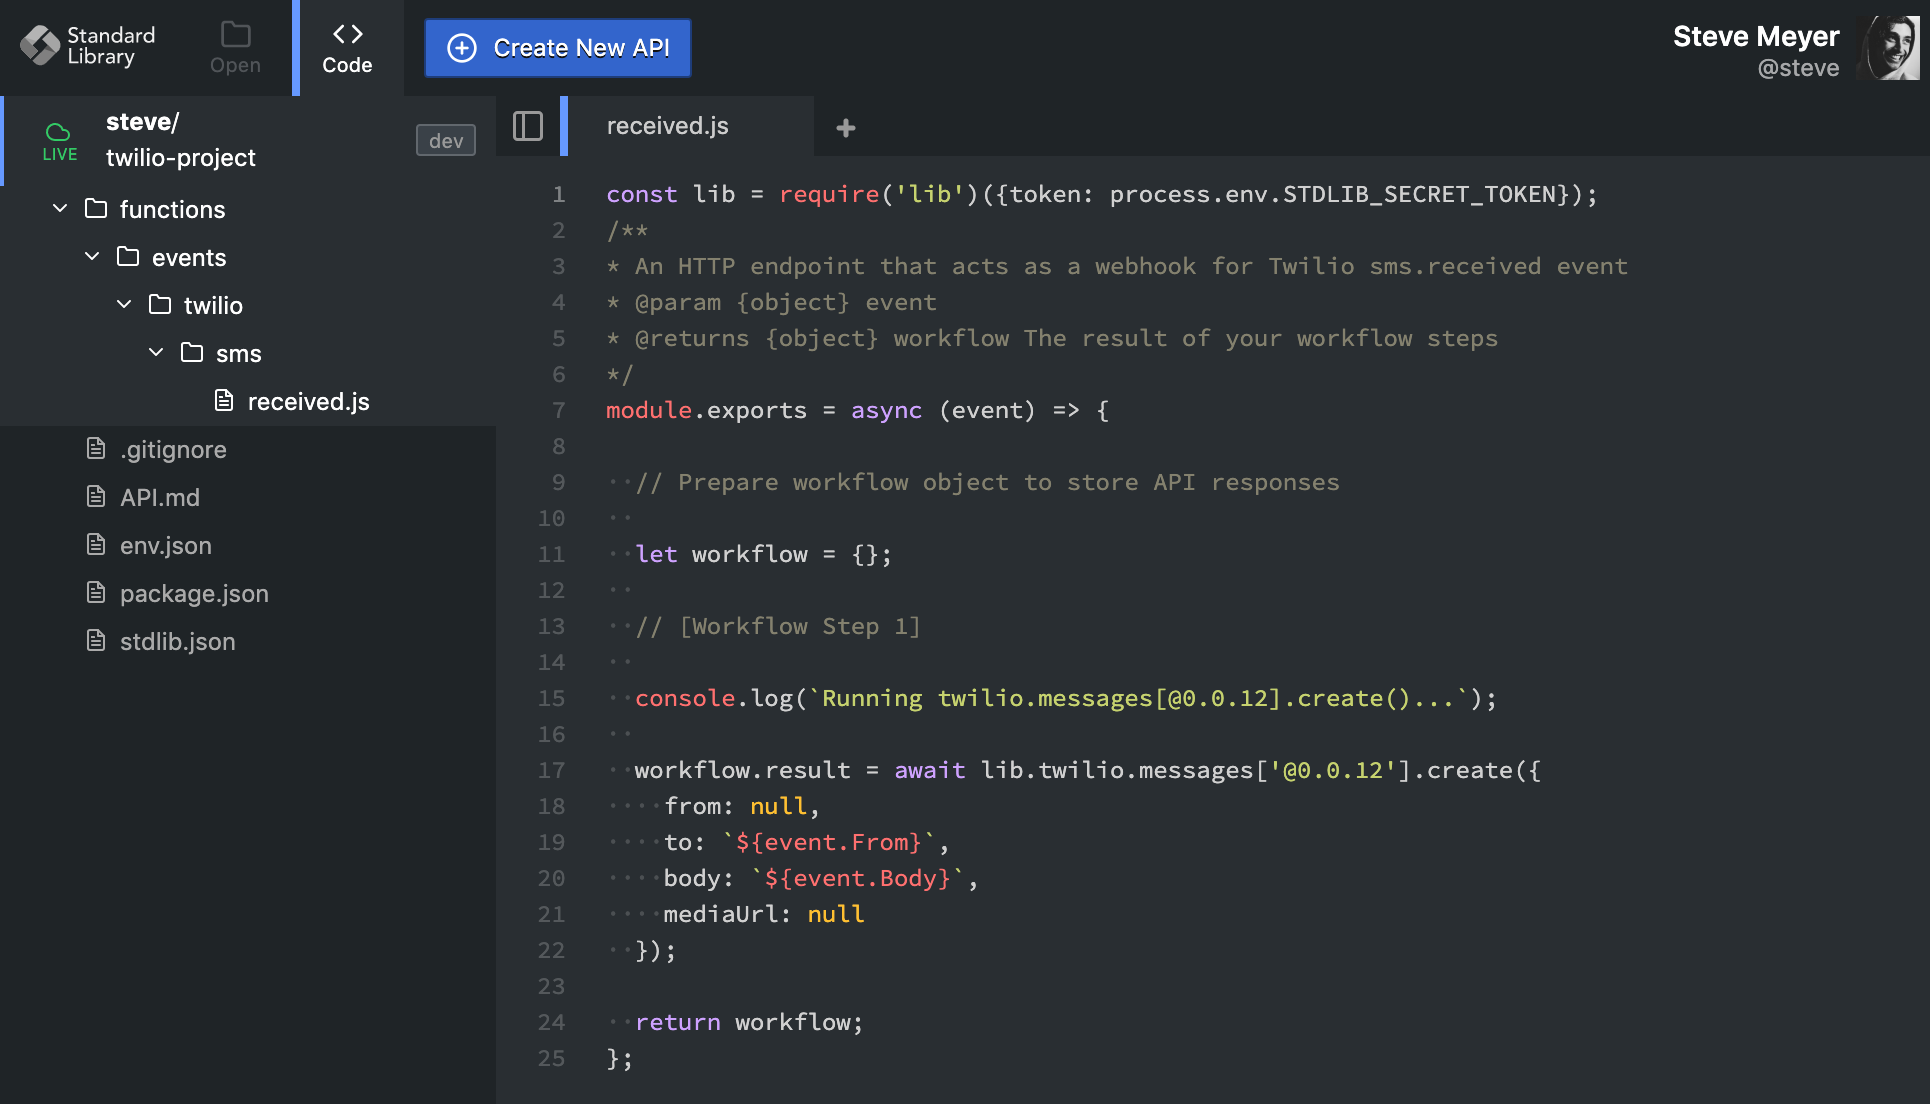
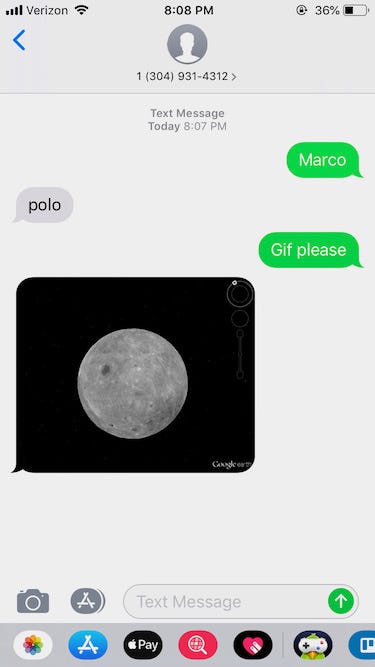
To workflow code, make any changes you want and click “Up” (the blue button in the bottom right). For example, you might want to change your handler to look something like:

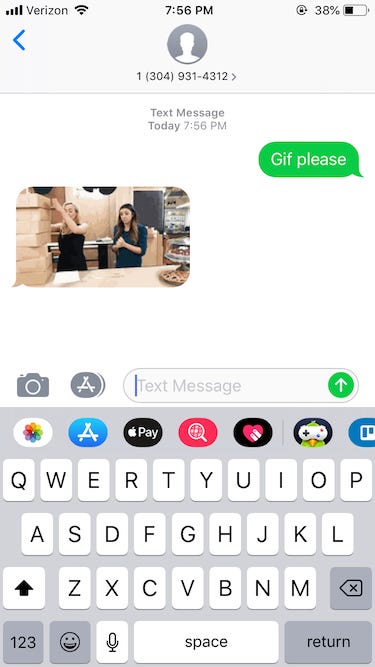
Which looks at the message body and does one of three things: It responds to “marco” with “polo”, “gif please” with a random gif, and echoes any other message back. After you copy and paste the code and click “Up” and send a few texts to your Twilio number to try it out!
That’s it!
In just a few minutes you set up a simple message hub with Twilio and Standard Library. As you just saw, you have full control when customizing your workflow with code. You can configure it do just about anything.
.png)
