
Airtable + Webflow is one of the most powerful combinations in all of no-code. By syncing Airtable and Webflow, you can create job boards, automated SEO pages, resource lists, and more.
In this short tutorial, I’ll walk through how to sync data between Airtable and Webflow step-by-step. To do this, we’ll use Whalesync, which was purpose-built to sync these two tools. Whalesync handles things like multi-reference and rich text fields out of the box and syncs data in real-time.
1. Prep Airtable
- Create a table/field in Airtable for every table/field in Webflow you want to sync
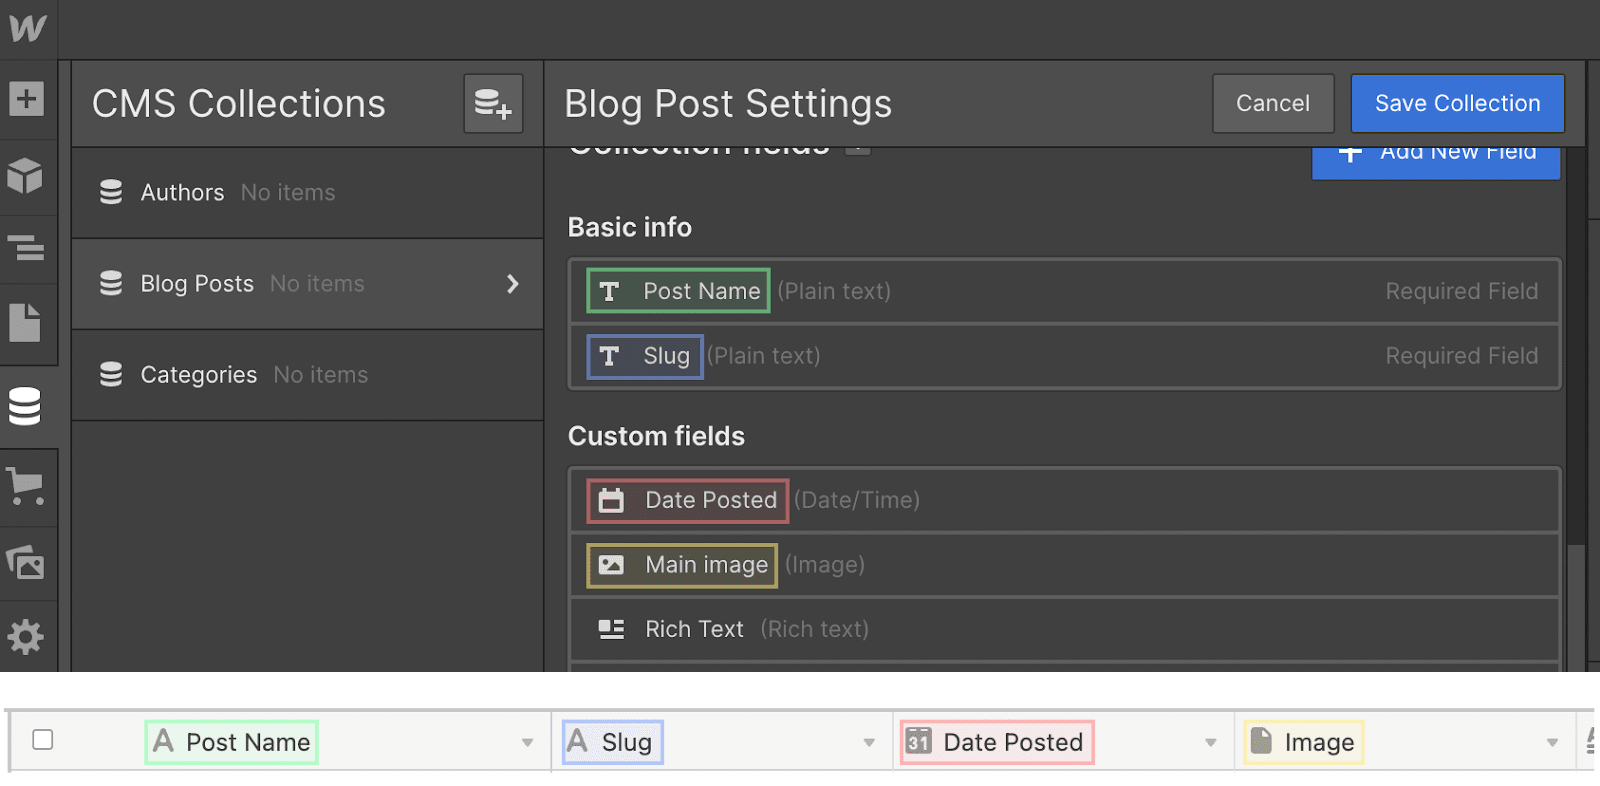
Example of matching fields in Webflow / Airtable
📌 Note - you do not have to sync every table/field 📌
2. Prep Webflow
- Ensure that any collection you want to sync with Airtable is empty in Webflow.

- Publish your site to all domains

3. Go to Whalesync and create a new base
- Navigate to app.whalesync.com
- From the Dashboard, select “Create New Base”

4. Grab your Airtable API key
- Go to your Airtable base and click the Account button in the top right

- Then choose “Account”

- From the Account overview page, copy the API key and paste it into Whalesync

5. Grab your Airtable base sharing link
- Go back to your Airtable base and click the “Share” button in the top right

- Choose “Base”

- Then “Create a shared link to the whole base”

- Then “Private read-only link”

- Finally, copy the base sharing link

- And paste it into Whalesync

📌 Note - Airtable is rolling out an update to their base sharing link UI soon, so the last few steps may look slightly different for some users📌
6. Grab your Webflow API key
- Click the Webflow button in the top left of the designer

- Select “Project Settings”

- Go to the Integrations tab

- Scroll to the bottom and click “Generate new API token”

- Copy that key and paste it into Whalesync
7. Map Airtable tables to Webflow collections
- Using the dropdowns, map the tables in Airtable and collections in Webflow you want to sync
📌 If the names of the tables match exactly across Airtable and Webflow, Whalesync will auto-map them for you 📌
8. Map Airtable fields to Webflow fields
- Similar to the last step, choose the individual fields you want to sync across Airtable and Webflow

📌 For a complete list of supported fields, see our docs 📌
9. Turn sync on
- From the Whalesync dashboard, toggle sync on

- Instantly see data start syncing in real-time
10. Check the Issues page for any errors
- After setting up a sync, check https://app.whalesync.com/issues to see if any records could not be synced
- Once you resolve an error, it will disappear from the Issues page

Conclusion
Whalesync is the easiest way to connect Airtable and Webflow. You can set up a real-time, two-way sync between your favorite tools in a few minutes. Let us know if you have any questions at hello@whalesync.com 🙂 or get started here.
.png)
